A Realistic 9-Day Kitchen Decluttering Plan for Busy People — Just 15 Minutes a Day
If your kitchen has been feeling messy and overwhelming lately, you’re not alone. The kitchen is one of those places where clutter builds up fast, even when we try to stay on top of it. That’s why having a simple kitchen decluttering plan can make such a difference.
Instead of trying to do everything at once, this step-by-step, 9-day plan will help you clear the clutter one small area at a time. You only need 15 minutes a day to see real progress.
We’ll go through each part of the kitchen, from the counters to the pantry and even those easy-to-ignore spots like the top of the fridge.
By the end of the nine days, your kitchen will feel lighter, more organized, and much easier to manage.
So grab a few boxes and let’s take it one day at a time. You’ve got this!
Before You Start: A Few Simple Rules
Before jumping into your 9-day kitchen decluttering plan, take a few minutes to set yourself up for success.
You’ll need a few boxes, baskets, bags, or even old cardboard boxes lying around the house. Don’t worry about them matching or looking pretty. Anything will do for now.
Label each one to keep things simple. You’ll need:
- One box for trash
- One for sellable items
- One for recyclables
- Another for items that belong in the kitchen but need to be rearranged
Keep these boxes in a corner of your kitchen for the entire nine days. That way, you won’t have to run around every time you come across something that needs to go.
Once the decluttering plan is complete, you can go through each box and deal with everything properly. For now, just focus on clearing the clutter one step at a time.
This post may contain affiliate links!
Simple Rules to Follow While Decluttering Your Kitchen
- If you haven’t used it in the last year, it’s time to let it go
- Keep only the items you use regularly or truly love
- Toss anything broken, chipped, cracked, or damaged
- Get rid of duplicate items you don’t actually need
- Remove lids without matching containers and containers without lids
- Throw away expired food, spices, and condiments
- Let go of gadgets or tools you bought but never actually use
- Donate dishes, cups, or utensils that you have far too many of
- Recycle empty boxes, packaging, or containers you’ve been holding onto
- Remove any decor or small appliances that only take up space but don’t serve a real purpose
- Be realistic about items you’re keeping “just in case,” but never end up using
9-Day Kitchen Decluttering Plan — Just 15 Minutes a Day
Now that you’re all set with your boxes and a simple method to follow, it’s time to start the actual decluttering. This 9-day kitchen decluttering plan breaks everything down into small, manageable tasks so you can clear the clutter without feeling overwhelmed.

Day 1: The counters and the island
The best place to start when decluttering your kitchen is the most visible spot, your counters and island. These surfaces make a huge difference in how tidy your kitchen feels. Here’s exactly how to do it, step by step:
Step 1: Remove Everything from the Counters and the Island
Clear off every single item. That includes small appliances, utensils, decor, spice racks; everything. This helps you see the space properly and gives you a clean slate.
Step 2: Give the Surface a Quick Clean
Wipe down the counters and island with a damp cloth or your favorite cleaner. It’s much easier to clean when the surface is empty.
Step 3: Clean the Items You Removed
Before putting anything back, quickly wipe down the items you plan to keep. You’ll be surprised how dusty or sticky things can get just sitting out.
Step 4: Only Put Back the Essentials
Be strict here. Only put back items you use very regularly, like your coffee machine, toaster, or utensil holder. The fewer items you keep out, the tidier and easier-to-clean your kitchen will feel.
Step 5: Keep Countertop Items Minimal and Neat
If you need to keep oils or spices out, use them as part of your decor. Pour cooking oils into clean, matching bottles. Keep your spices in a neat rack, preferably near the stove where you actually use them. Everything else should be put away.
Examples of What to Avoid Keeping on the Counter:
Old mail, random decor that collects dust, extra mugs, storage containers, or small appliances you barely use (like a waffle maker or blender if they only get used once in a while).
Step 6: Sort the Rest into Boxes
Anything you’re not keeping on the counter needs to go into the correct box:
- Trash box for anything broken or unusable
- Recycle box for packaging or old containers
- Sell or donate box for extra or duplicate items
- Rearrangement box for items you still use but want to store elsewhere later
The goal is simple: keep your counters clear, your essentials easy to access, and everything else tucked away. It makes the space look tidy and so much easier to work in.
Day 2: Fridge and Freezer Refresh
The fridge and freezer are one of the easiest areas in the kitchen to forget about, but they collect clutter fast.
Expired food, mystery containers, and forgotten leftovers can pile up before you know it. Today, you will declutter, clean, and organize this space step by step.
Start by emptying everything from the fridge and freezer. Take out every bottle, jar, container, and food item. This lets you see exactly what you have and makes cleaning easier.
Go through each item carefully. Toss anything expired, spoiled, or that you know you will not eat. Be strict with old leftovers and check sauces and condiments for expiry dates.
If you come across items that are still good but you never use them, either give them away or toss them. No need to hold on to things that take up space.
Once everything is out, wipe down the shelves, drawers, and walls of the fridge and freezer.
A mix of warm water and mild soap or vinegar works great for this. Dry everything with a clean cloth before putting items back.
If your freezer has built-up ice, unplug it and place a bowl of hot water inside to melt the ice quickly. You can gently scrape the ice with a plastic spatula if needed, but never use sharp tools.
When you put food back, organize it by category. Keep dairy together, fruits and veggies in the drawers, and sauces and condiments in the fridge door. In the freezer, group meats, frozen vegetables, and snacks separately.
*The refrigerator that is too messy, may take longer than 15 minutes*
Day 3: Pantry Declutter
Decluttering the pantry is not just about tossing expired food. It is your chance to make your pantry work better, save money, and reduce daily stress in the kitchen. With a few smart tricks and the right products, it gets easier to keep it neat long term.
Start by clearing one shelf at a time. Do not empty the entire pantry at once or you will feel overwhelmed. Take out everything from the top shelf or one section and lay it on the counter.
Check expiry dates, but also inspect the condition of the packaging. Half-open bags, leaking containers, or dented cans need to go. These can attract pests and clutter your space.
As you sort items, group them in a way that actually fits your routine. Instead of broad categories like “cans” or “snacks,” try creating practical groups like Quick Dinner Ingredients, Baking Supplies, or Lunchbox Snacks. This makes meal prep faster.
Invest in clear storage bins or baskets to keep smaller items tidy. Stackable bins like the mDesign plastic pantry bins or simple clear containers from IKEA work well for this. You can also use labeled glass jars for grains, pasta, or baking ingredients. It keeps your shelves looking neat and you can easily see what you have.
Label everything. A basic label maker or simple adhesive labels make a huge difference in keeping the pantry organized for the long run.
One of the best tricks is to create an “Eat Me First” basket. Use a small bin or basket for items that are close to expiry. Place it right at the front so nothing gets forgotten and wasted.
Your pantry does not have to be Pinterest-perfect. But with these small changes and helpful tools, it will feel more organized, practical, and easy to manage every day.
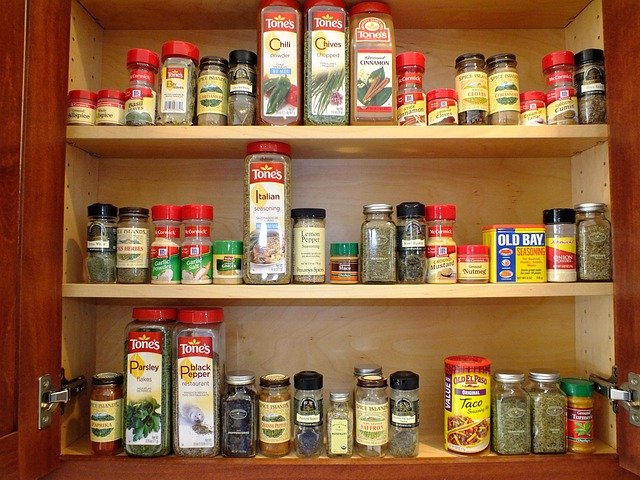
Day 4: Spices, Condiments & Oils (Spice Racks and Drawers)
Today is all about the small but messy stuff; spices, sauces, condiments, and cooking oils. These items might seem harmless, but when they’re unorganized, they take up too much space and make everyday cooking frustrating.
Start by emptying your spice rack, drawer, or cabinet. Lay everything out so you can see what you actually have. You’ll probably find duplicates, expired jars, or blends you forgot you even bought.
Toss anything expired, stale, or that you haven’t used in over a year. If the label is faded or the lid is broken, it’s time to let it go.
Combine duplicates when possible. If you have two half-used jars of the same spice, consolidate them into one clean, labeled container. Wipe off the bottles as you go so everything feels fresh.
If you don’t already have one, consider investing in a tiered spice rack or spice drawer insert. These help you see all your spices at once without having to dig around. A lazy Susan is great for oils, sauces, or jars stored in cabinets.
Use matching glass jars with labels to make your spices easier to find and much nicer to look at. Airtight containers also help them last longer.
For oils and condiments, group them by use; for example, everyday cooking oils near the stove and baking extracts near baking items. Wipe sticky bottles and oily residue before putting anything back.
A little order in your spices and condiments goes a long way. It speeds up cooking, prevents messes, and helps you avoid overbuying what you already have.
Day 5: Upper Cabinets and above the kitchen cabinets
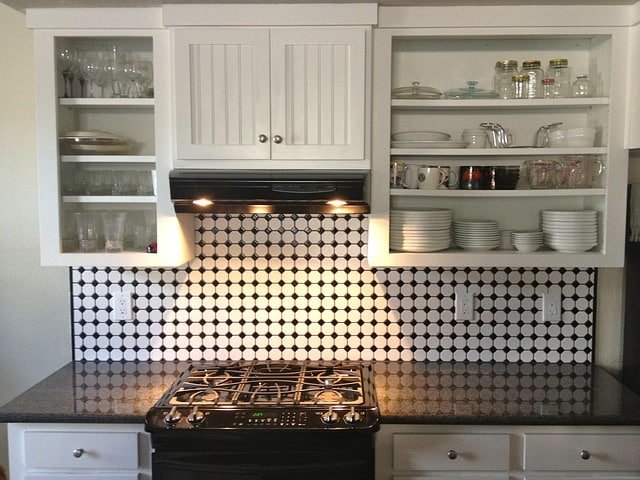
Today is the day to tackle the upper cabinets and those hidden spots above your kitchen cabinets.
These areas often turn into storage for forgotten or rarely used items. It is easy to overlook them, but they deserve a proper decluttering session.
Start with one upper cabinet at a time. Empty it completely so you can see everything inside.
If you have a lot of upper cabinets in a bigger kitchen, feel free to spread this task over two days. Wipe the shelves with a damp cloth and replace old shelf liners with fresh ones.
Before you put things back, place a small bowl of baking soda or a few bay leaves in each cabinet. They help absorb bad smells and keep crickets or small bugs away.
Be very selective with what stays. Keep only dishes, glassware, or cookware you actually use. Large pots or special items like a turkey roaster can stay but should be stored at the back.
Do not skip the space above your kitchen cabinets. If you keep baskets, large trays, or decor up there, pull them down, clean the area, and only return what looks tidy and purposeful.
The same goes for tall cabinets or cabinets stacked above other cabinets.
Day 6: Lower Cabinets, Island Cabinets and Drawers.
Lower cabinets and island drawers often hide the worst of the kitchen clutter. This is where things you rarely use end up forgotten.
Today, open every door and drawer, especially the ones that have not been touched in months.
You might find old trays, broken appliances or random items that do not even belong in the kitchen.
Remove everything that feels unnecessary or has not been used in ages. These areas often feel overwhelming because things get shoved inside without thinking.
It is also the perfect time to check for signs of moisture or pests. Wipe surfaces clean and if you notice any smell, place a few bay leaves or a small bowl of baking soda inside.
For deep drawers or awkward cabinets, use large storage bins or pull-out baskets to make access easier and keep everything neat.
Day 7: Junk Drawer & Under the Sink
The junk drawer and under the sink area are often the messiest spots in the kitchen. These spaces collect forgotten, broken, or completely random items that have no real home.
Start with the junk drawer. Pull everything out and lay it on the counter.
Toss old receipts, dried-up pens, broken clips, and anything else that does not belong. Keep only useful items like scissors, a small notepad, spare keys, or batteries. To keep it organized long-term, use simple drawer organizers like small plastic trays or adjustable dividers. You can easily find these at home stores or online.
Next, look under the sink. Many people avoid this space, but it often holds cleaners, old sponges, plastic bags, or random junk. If it is empty, now is your chance to set it up properly. If it is cluttered, clear it out and wipe it clean.
Want smart ideas for organizing this space?
Check out these under-sink organization ideas for easy ways to make it neat and practical.
Day 8: Items Stored Outside the Kitchen
Over time, it is common to store extra kitchen items outside the kitchen, especially if space is tight.
You might have tucked away some dishes in the closet, stored serving trays in a wardrobe or placed rarely used appliances in a storage cabinet down the hall.
Today, it is time to bring all those items back where they belong. Walk through your home and collect everything that is meant for the kitchen. Place it all on your kitchen island or counter so you can go through it properly.
Look at each item and decide if you actually need it.
Anything unnecessary can go straight to your trash, donation or sell box.
The useful items should be returned to the kitchen and placed in their proper spots, whether that is a drawer, a cabinet or your pantry.
Day 9: Miscellaneous Areas
The final day is for all those miscellaneous spots in your kitchen that you have not covered yet. These little areas often get ignored but they quietly collect clutter over time.
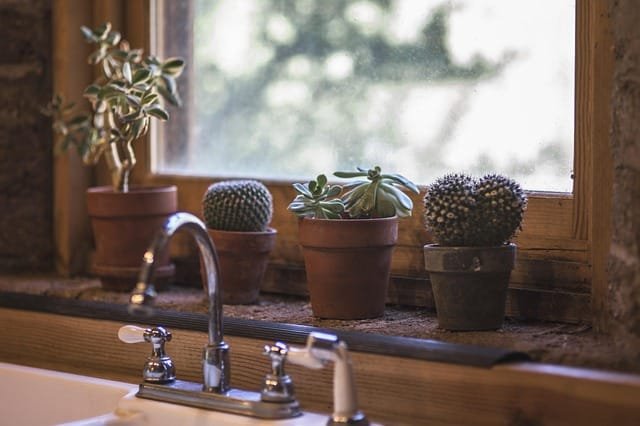
Look at the top of the refrigerator, windowsills, and the space around the microwave. These places are easy to forget but they deserve a quick check.
Some people even store things inside the oven without realizing how much space it takes up or how unsafe it can be. If you are one of them, now is the perfect time to empty it out and declutter.
Any other small corner, shelf, or surface in your kitchen that still feels messy gets its turn today.
Dealing with the Boxes
Once your kitchen is fully decluttered, it is time to deal with the boxes you have been filling throughout the process.
Do not leave them sitting around for weeks. Handle them right away so your kitchen feels truly finished.
Take the donation box and trash box straight to the car so you can drop them off or dispose of them on your next trip out.
For items in the sell box, list them immediately on Facebook Marketplace or any selling app you prefer. The rearranged box items should be put in their proper places around the house right now.
This simple final step makes all the difference in keeping your home clutter-free.
How to Keep Your Kitchen Clutter-Free After Decluttering
You worked hard to clear the clutter, now it is all about keeping it that way. A few simple habits can help your kitchen stay neat and organized for the long run, without needing constant big decluttering sessions.
- Do a quick 5-minute tidy-up every day. Put things back where they belong after cooking or cleaning.
- Avoid using counters and island space as storage. Keep them as clear as possible.
- Be mindful of what comes in. Before buying new gadgets, dishes, or storage items, ask yourself if you truly need them.
- Empty the junk drawer regularly. Do not let small random items pile up again.
- Use labels and containers to keep everything in its place. It helps every family member know where things go.
- Clean out the fridge and pantry once a month. This prevents old food and clutter from building up.
Small, consistent habits are the easiest way to maintain an organized, clutter-free kitchen.
Wrapping Up
That is it. Your kitchen is finally decluttered, step by step, without the overwhelm. You cleared the visible spots, tackled hidden areas, and handled all those forgotten corners.
The key now is to stay consistent with small habits so the clutter does not creep back in. A little daily effort will keep your kitchen neat, fresh, and easy to use.
