How Often Should You Clean the Bathroom Floor — Plus Exactly How to Do It
The bathroom floor is one of the most-used and dirt-prone areas in any home. It deals with a mix of moisture, dust, hair, soap residue, and bacteria daily.
Whether it’s water splashes from the shower, toilet drips, or dirt tracked in by bare feet, messes can build up fast if not cleaned regularly.
Keeping your bathroom floor clean is essential for hygiene, safety, and preventing problems like mold, slippery surfaces, and unpleasant odors.
So, how often should you clean the bathroom floor? That depends on a few key factors, which we’ll explore later in this guide.
In this article, you’ll also get a simple, step-by-step guide to do it the right way. A few smart habits and the right tools can keep your bathroom looking clean and fresh with minimal effort.
How Often Should You Clean the Bathroom Floor?
Since the bathroom floor is one of the most overlooked yet dirtiest areas in your home, it deserves more attention than most people give it.
For most households, cleaning the bathroom floor once a week is not enough.
To maintain hygiene, prevent slips, and avoid bacterial growth, the floor should be cleaned and mopped two to three times a week.
If you do have young children or pets, expect water splashes, paw prints, soap drips, and outdoor dirt to show up more often.
In such cases, cleaning and mopping every 2 to 3 days becomes even more essential, especially around the toilet, tub, and sink areas where buildup is the worst.
In bathrooms that are not frequently used but have high humidity or don’t get enough ventilation, the floors stay damp longer, creating the perfect environment for mold and mildew.
Clean these bathrooms at least twice a week and keep them dry by leaving windows open or using an exhaust fan.
For low-traffic guest bathrooms, once every two weeks might be enough, but still do a quick visual check weekly. Dust, hair, or stale smells can settle in even when a bathroom goes unused.
Deep clean your bathroom floors once a month, focusing on grout lines, corners, and areas around the toilet base. Use a disinfectant floor cleaner or a vinegar-water mix, and make sure to rinse well to avoid streaks.
Bathroom floors are constantly exposed to moisture and germs. If left uncleaned, they can become slippery, smelly, and even spread bacteria to other parts of your home.
So, how often should you clean the bathroom floor?
At least two to three times a week, no matter your lifestyle or household size.
Exactly How to Clean the Bathroom Floor (Step-by-Step)
Here’s a simple, step-by-step guide to help you clean your bathroom floor thoroughly and efficiently.
From picking the right tools to drying it properly, these tips ensure a safe, germ-free, and sparkling clean floor every time.
Tools Needed to Clean the Bathroom Floor
- Handheld vacuum or dry microfiber mop
- Microfiber mop, spin mop, or flat mop
- Steam mop (optional)
- Bucket
- Cleaning solution (based on floor type)
- Scrub brush or old toothbrush
- Baking soda
- Microfiber cloths or rags
- Dry mop or clean towel
- Disinfectant spray (optional)
- Gloves
- Trash bag or basket
Steps:
1. Clear the Area First
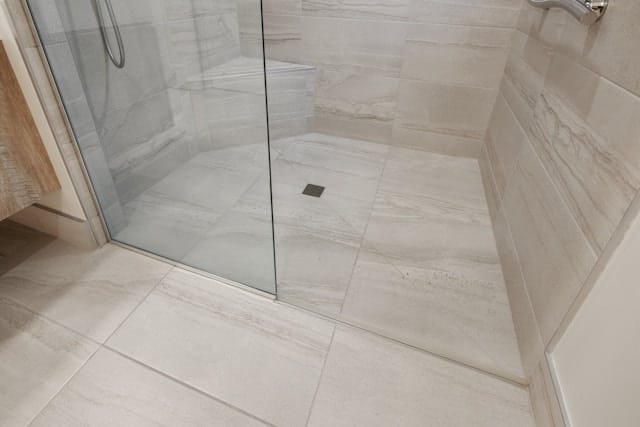
Before you begin cleaning, remove everything from the bathroom floor. This includes:
- Rugs and bath mats
- Trash bins and toilet brushes
- Plungers, small stools, or storage baskets
- Any loose toiletries or cleaning items placed on the floor
Clearing the space ensures you have unrestricted access to every corner of the bathroom, especially tight spots behind the toilet or under cabinets that are often skipped during quick cleans.
It also helps prevent water damage to fabrics, paper products, or wooden accessories that might accidentally get wet during mopping.
Taking just a couple of minutes to declutter the floor sets you up for an efficient and thorough clean, no need to mop around obstacles or backtrack later.
2. Dry Dust or Vacuum Thoroughly
Start by removing loose hair, dust, and debris using a handheld vacuum, dry microfiber mop, or a soft-bristle broom.
Pay extra attention to areas around the toilet base, under the sink, and along the corners, where dust and hair tend to collect the most.
If you skip this step, your mop will simply spread dirt around, making the floor look streaky and unclean even after mopping.
It’s particularly beneficial in homes with long-haired family members or pets, where buildup can occur quickly.
3. Choose the Right Cleaner Based on Floor Type
Using the right cleaner is essential to protect your bathroom floors and get a thorough clean. Different floor materials require different care:
- Tile or Grout: Use warm water mixed with white vinegar for everyday cleaning. For a deeper clean, go with a neutral tile and stone cleaner that won’t damage the grout or tiles.
- Vinyl or Laminate: Stick with mild dish soap and water. Avoid using harsh or abrasive chemicals that can cause peeling, warping, or discoloration.
- Stone (Marble or Granite): Always use a stone-safe cleaner. Never use vinegar or anything acidic, as it can etch, dull, or permanently damage the natural surface.
4. Prepare Your Mop or Scrub Tools
Before starting, gather the right cleaning tools. Use a microfiber mop, a spin mop, or a floor-safe scrub brush depending on your floor type.
These tools help clean effectively without damaging surfaces.
Wring out excess liquid so the mop is damp, not dripping wet.
Too much water can leave streaks, cause puddles, and even lead to floor damage, especially on laminate or wood surfaces.
5. Mop the Floor in Small Sections
Begin cleaning by working in small sections across the floor.
This approach helps you clean more thoroughly and keeps you from spreading dirt into already-cleaned areas.
Rinse your mop often in clean water and replace your cleaning solution if it gets cloudy or dirty.
Using dirty water only makes the floor grimy again and leaves behind residue.
6. Disinfect High-Use Zones
Pay special attention to high-germ areas like the toilet base, sink, and shower or tub edges.
These zones collect moisture, soap scum, and bacteria quickly.
Give them an extra scrub or mop pass during each cleaning session. You can use an antibacterial spray for added protection.
Consistently focusing on these zones helps maintain a more hygienic bathroom overall.
7. Clean Baseboards and Corners
Don’t overlook the baseboards and hard-to-reach corners where dust and grime tend to collect.
Use a damp microfiber cloth or the edge of your mop to wipe along the baseboards.
For tight spots and corners, use a small cleaning brush or an old toothbrush.
These tools can get into crevices that mops often miss, leaving your bathroom thoroughly cleaned and polished from edge to edge.
8. Scrub Grout Lines (Monthly)
Grout lines trap dirt over time, making your bathroom floor look dull and dirty.
Once a month, apply a paste of baking soda and water directly onto the grout lines. Let it sit for 5 to 10 minutes to break down the buildup.
Then scrub using a toothbrush or grout brush for a deep clean. Rinse thoroughly with warm water to wash away residue.
Regular grout maintenance helps keep the floor looking bright and stain-free.
9. Dry the Floor Completely
After mopping and rinsing, use a clean towel or dry microfiber mop to remove leftover moisture.
Bathroom floors stay damp longer, especially near the toilet and sink.
Drying the floor is a crucial step that helps prevent mold, slippery surfaces, and water damage around floor edges and corners.
If you skip this, moisture can seep into tile grout or underneath laminate and cause long-term issues.
10. Air Out the Bathroom
Ventilation helps the floor dry faster and prevents excess moisture from lingering in the room.
After cleaning, open a window, turn on the exhaust fan, or leave the door open for at least 15–20 minutes.
Good airflow not only helps the floor dry faster but also reduces the risk of mold and mildew forming on walls, grout, or bathroom corners.
It’s a simple habit that protects both your floor and air quality.
11. Add a Scented Disinfectant Mist (Optional)
Once everything is clean and dry, finish with a light mist of a scented disinfectant spray.
This gives your bathroom a fresh, pleasant scent while adding an extra layer of germ protection.
Choose a spray that is safe for floors and doesn’t leave a sticky residue.
12. Maintain With Quick Spot Cleaning
To make your weekly mopping easier, keep tools on hand for daily touch-ups.
Use a spray mop, disinfecting wipes, or a handheld steam mop to quickly clean up water spots, toothpaste drips, or muddy footprints.
Focus on areas around the sink, toilet, and tub.
Doing this just once a day or even a few times a week can significantly cut down on grime and reduce how often you need to deep clean.
Final Thoughts
Keeping your bathroom floor clean is not just about looks. It’s a key part of maintaining a healthy and hygienic home.
This space collects moisture, bacteria, hair, and dirt every single day. If left unattended, it can quickly become a breeding ground for germs and odors.
By making it a habit to clean your floor two to three times a week, you can avoid buildup, prevent slips, and keep your bathroom feeling fresh.
Whether you live in a busy household with kids and pets or have a quieter space, consistency matters more than perfection.
Add a monthly deep clean to your schedule to tackle grout and tight corners, and stay ahead of mold or mildew in humid areas.
With just a few tools and a simple routine, you’ll keep your bathroom floor safe, spotless, and guest-ready every day. Small efforts lead to a cleaner, healthier home overall.
Read more:
- 20 Surprisingly Easy Bathroom Cleaning Hacks That Leave No Dirt Behind
- 20+ Practical Kitchen Cleaning Hacks That Go Way Beyond the Basics
- How To Organize Your Room And Always Keep It That Way
- 15 Shockingly Simple Habits Of People Who Keep Their House Clean All The Time
- 25+ Effective Cleaning Hacks You Won’t See All Over the Internet

